The first step is to create a Bing Webmaster Tools account, where you can add sites. Note that you must prove that you own the site (or appropriate sections of the site) to add it to your Webmaster Tools account. You can create a property that includes an entire domain (example.com) or a property that is limited to a single branch (example.com/clothing/).
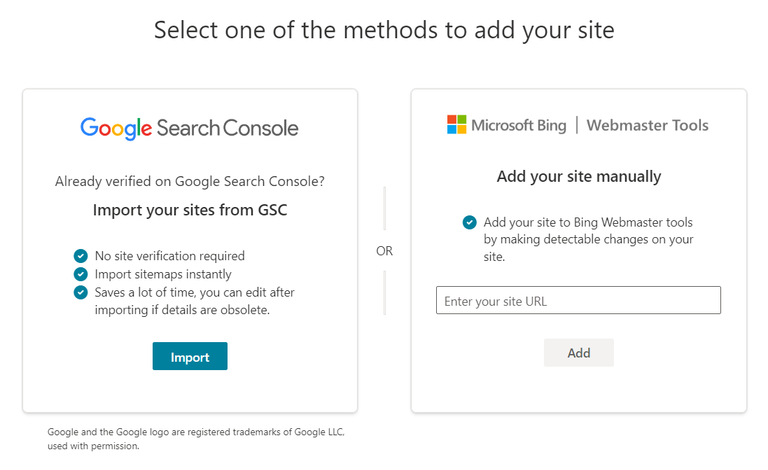
We can add a site in two ways:
Import sites from Google Search Console: If you have a verified Google Search Console account, you can import the settings (user details, level, etc.) along with the property directly into Bing. To import your sites, Bing Webmaster Tools needs permission to access information from your Search Console account. Using this access, Bing Webmaster Tools will display the list of verified sites present in your Google Search Console account along with the Sitemaps and their corresponding role in each site. You can select the sites that you want to add to Bing Webmaster Tools and click Import. On successful completion, the selected sites will be added and get automatically verified in Bing Webmaster Tools.
Add your site manually: You can also add sites manually by entering the URL in the input box and clicking add.
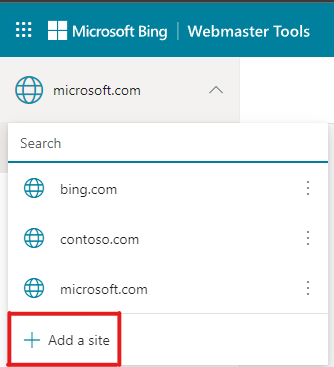
If you are an existing user, add a site from the dropdown on the left navigation panel and proceed with the same steps mentioned above.
Once your site is added, it usually takes 48 hours for our system to generate analytics and data. You can also delete an added site from the left navigation itself through more options.
Managing Search Console access: Bing Webmaster Tools will periodically validate the site ownership status by accessing your Search Console account. During this validation, any new sitemap found on your Search Console account will also be imported automatically to your Bing Webmaster Tools account. You can see the list of Search Console accounts linked to your Bing Webmaster Tools account under the Profile section. If you want to stop Bing Webmaster Tools from accessing your Search Console account, you can choose Disconnect option present beside the account details in the Profile section.
Note:
The number of websites displayed for import may be different than the number of verified sites present in your Google Search Console account. This happens as some of the sites in your Google Search Console account are already present in your Bing Webmaster Tools account with either equal or higher permission levels.
Some of the site URLs may have been normalized and grouped together.
A maximum of 100 websites can be imported in one go. Repeat the steps mentioned above to import more. The limit of 1000 sites addition per Bing Webmaster Tools account still applies.
Verify ownership of your website
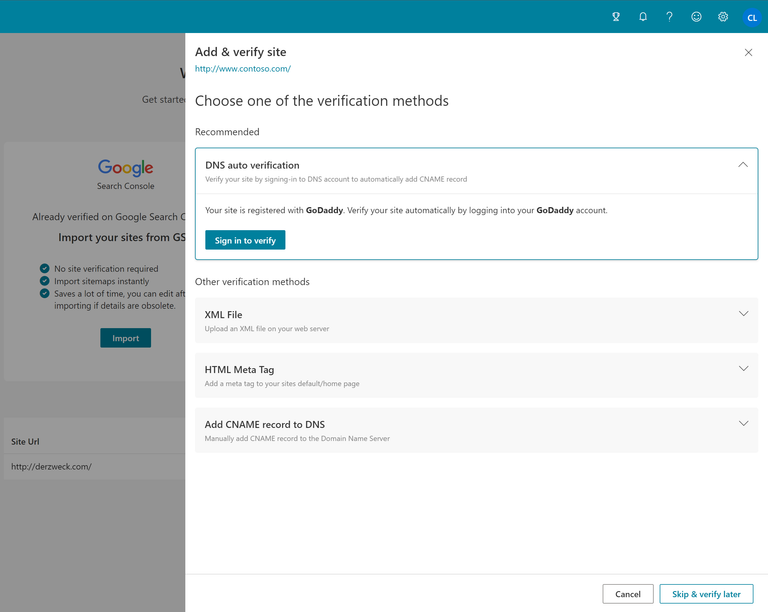
To complete the addition of a new site to your account, you need to verify that you own the site by proving ownership. There are four methods of ownership verification. Click the option best suited to your site and follow the on-screen instructions:
DNS auto verification: Bing Webmaster Tools supports Domain Connect standard to automatically detect the DNS provider and take over the CNAME insertion task. All you need to do is to login to your DNS account, when prompted, and CNAME will be automatically added to the DNS account. Please note that Domain Connect needs to be adopted by the DNS providers as well, so this verification option will only be visible for DNS providers who have adopted Domain Connect and partnered with Bing. On successful sign-in to the DNS provider site, your website will get verified in Bing Webmaster Tools within few seconds. In certain cases, it may take longer for DNS provider to send the site ownership signal to Bing Webmaster Tools service.
Note:
In case the site does not support Domain Connect protocol, by default you will see the other three options (viz. XML file authentication, Meta tag authentication or Add a CNAME record to DNS) for verification.
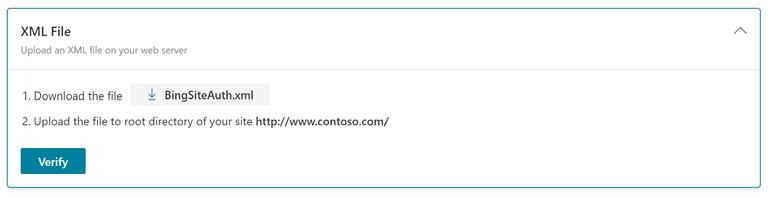
- XML File authentication: Click BingSiteAuth.xml to save the custom XML file, which contains your customized ownership verification code, to your computer, and then upload the file to the root directory of the registered site.
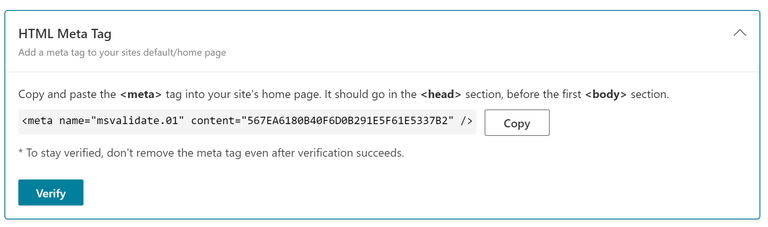
- Meta tag authentication: Copy the displayed meta tag with your custom ownership verification code to the clipboard. Then open your registered site’s default page in your web development environment editor and paste the code at the end of the head section. Make sure the head section is followed by a body tag. Lastly, upload the revised default page file containing the new meta tag to your site.
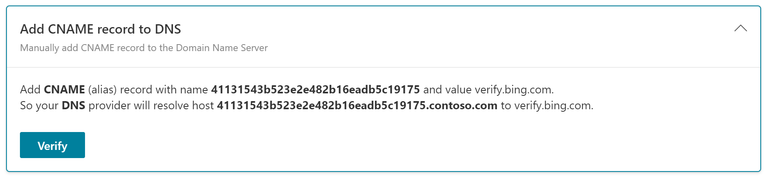
- Add CNAME record to DNS: This option requires access to your domain hosting account. Inside that account you can edit the CNAME record and type the verification code (series of numbers and letters) we have provided you with. When complete, we can see this information and verify your ownership of the site.
- Add CNAME record to DNS: This option requires access to your domain hosting account. Inside that account you can edit the CNAME record and type the verification code (series of numbers and letters) we have provided you with. When complete, we can see this information and verify your ownership of the site.
Source : Bing.
Comments
Post a Comment
Do not insert clickable links or your comment will be deleted. Checkbox Send me notifications to be notified of new comments via email.