How can I integrate MTE crash detection and tombstone parsing into an automated Android CI/CD testing pipeline?
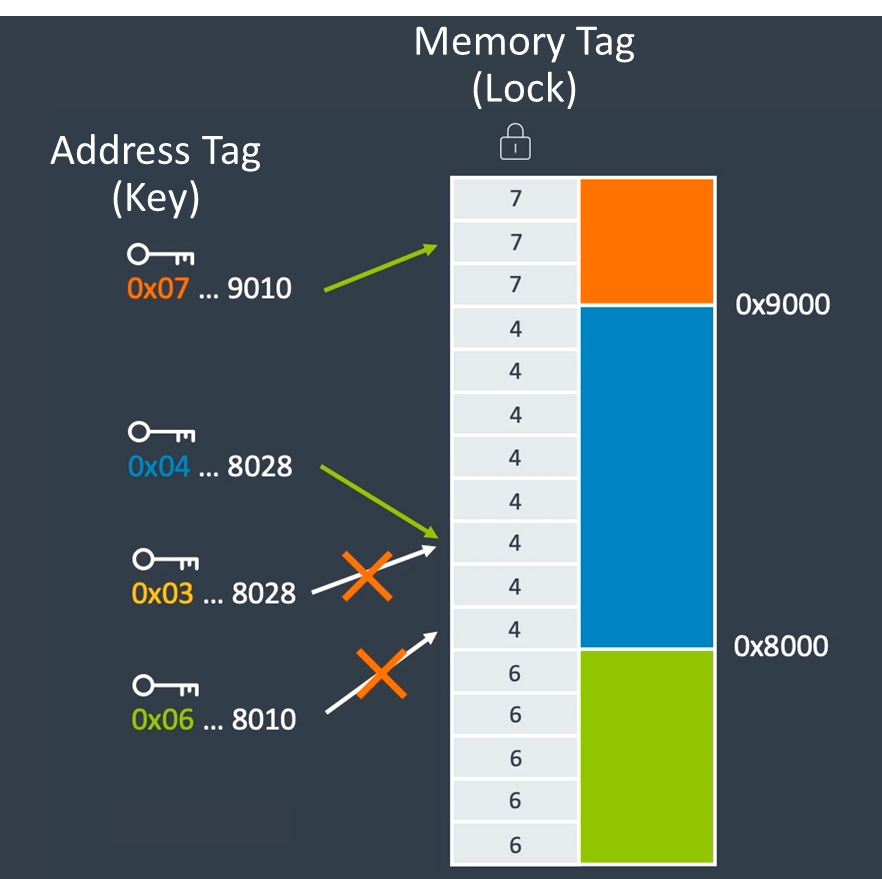
Integrating ARMv9 Memory Tagging Extension (MTE) crash detection into an automated CI/CD pipeline requires a 4-stage strategy:
-
Environment Preparation: Forcing MTE synchronous mode (
sync) and clearing stale logs. -
Test Execution & Capture: Running connected tests while capturing
logcatand/data/tombstones/. -
Symbolication & Parsing: Filtering tombstones for
SEGV_MTESERR(MTE errors) and usingndk-stackwith unstripped.sobinaries to pinpoint source line numbers. -
Pipeline Gate: Failing the build and uploading symbolicated logs as CI artifacts.
Stage 1: App & Environment Configuration
1. Configure AndroidManifest.xml
Ensure your app or test application requests synchronous MTE mode so the CPU aborts instantly on tag mismatches:
XML
<application
    android:name=".MainApplication"
    android:memtagMode="sync">
</application>
2. Prepare the Device/Emulator via ADB
Before executing tests in CI, clean up old tombstones and force MTE for your app package:
Bash
# Force MTE sync mode for your package
adb shell setprop arm64.memtag.app.com.example.myapp sync

# Clear pre-existing tombstones from previous runs
adb shell "su 0 rm -f /data/tombstones/*" || adb shell "rm -f /data/tombstones/*"

# Clear logcat buffer
adb logcat -c
Stage 2: Tombstone Extraction & Symbolication Script
Create a script (e.g., process_mte_crashes.sh) to pull, filter, and symbolicate MTE crashes.
Bash
#!/usr/bin/env bash
set -e

PACKAGE_NAME="com.example.myapp"
SYMBOLS_DIR="app/build/intermediates/cxx/Debug/obj/arm64-v8a"  # Path to unstripped .so files
OUTPUT_DIR="build/mte_reports"

mkdir -p "$OUTPUT_DIR"

echo "=== Searching for MTE Crashes ==="

# 1. Check logcat for MTE fault signals
MTE_CRASHES=$(adb logcat -d | grep -E "SEGV_MTESERR|SEGV_MTEAERR|Cause: \[MTE\]" || true)

if [ -z "$MTE_CRASHES" ]; then
    echo "✅ No MTE crashes detected in logcat."
    exit 0
fi

echo "⚠️ MTE Crash Detected! Pulling tombstones from device..."

# 2. Pull tombstones from /data/tombstones/
adb pull /data/tombstones/ "$OUTPUT_DIR/raw_tombstones/" || true

MTE_FOUND=false

# 3. Process each tombstone
for tombstone in "$OUTPUT_DIR/raw_tombstones/"tombstone_*; do
    [ -e "$tombstone" ] || continue

    # Check if tombstone contains MTE fault codes
    if grep -qE "SEGV_MTESERR|SEGV_MTEAERR|Cause: \[MTE\]" "$tombstone"; then
        MTE_FOUND=true
        TOMBSTONE_NAME=$(basename "$tombstone")
        REPORT_FILE="$OUTPUT_DIR/symbolicated_$TOMBSTONE_NAME.txt"

        echo "Processing MTE Tombstone: $TOMBSTONE_NAME"

        # Symbolicate raw memory addresses using ndk-stack
        $ANDROID_NDK_HOME/ndk-stack \
            -sym "$SYMBOLS_DIR" \
            -dump "$tombstone" > "$REPORT_FILE"

        echo "----------------------------------------------------"
        echo "MTE Crash Summary ($TOMBSTONE_NAME):"
        grep -E "Cause: \[MTE\]|signal 11|backtrace:" -A 10 "$REPORT_FILE" || true
        echo "----------------------------------------------------"
    fi
done

if [ "$MTE_FOUND" = true ]; then
    echo "❌ CI FAILED: One or more ARMv9 MTE memory safety violations detected!"
    exit 1
fi
Stage 3: GitHub Actions CI/CD Pipeline Integration
Here is a complete GitHub Actions workflow executing native tests on an MTE-enabled runner or connected device.
YAML
name: Android MTE Memory Safety CI

on:
  push:
    branches: [ main, develop ]
  pull_request:

jobs:
  mte-analysis:
    runs-on: ubuntu-latest # Or self-hosted ARM64 runner with physical MTE
    steps:
      - name: Checkout Code
        uses: actions/checkout@v4

      - name: Set up JDK 17
        uses: actions/setup-java@v4
        with:
          distribution: 'temurin'
          java-version: '17'

      - name: Setup Android NDK
        uses: n笃/setup-android-ndk@v1 # Ensures $ANDROID_NDK_HOME is set
        with:
          ndk-version: r26b

      - name: Build Native Debug Binaries
        run: |
          # Build app and unstripped binaries for arm64-v8a
          ./gradlew assembleDebug --stacktrace

      - name: Launch Android ARM64 Emulator (MTE-supported)
        uses: reactivecircus/android-emulator-runner@v2
        with:
          api-level: 34
          arch: arm64-v8a
          target: google_apis
          script: |
            # 1. Environment Prep
            adb shell setprop arm64.memtag.app.com.example.myapp sync
            adb shell "rm -f /data/tombstones/*"
            adb logcat -c

            # 2. Run Connected Instrumentation Tests
            ./gradlew connectedAndroidTest --continue || true

            # 3. Run Tombstone Parsing and MTE Audit Script
            chmod +x ./scripts/process_mte_crashes.sh
            ./scripts/process_mte_crashes.sh

      - name: Upload MTE Crash Artifacts on Failure
        if: failure()
        uses: actions/upload-artifact@v4
        with:
          name: mte-tombstone-reports
          path: build/mte_reports/
Stage 4: Programmatic In-App Capture (Android 12+)
To capture MTE native crashes programmatically inside your Java/Kotlin test harness (without needing adb pull root permissions), use ApplicationExitInfo:
Kotlin
import android.app.ActivityManager
import android.app.ApplicationExitInfo
import android.content.Context
import androidx.test.core.app.ApplicationProvider


fun checkForMteCrashesOnPreviousRun() {
    val context = ApplicationProvider.getApplicationContext<Context>()
    val am = context.getSystemService(Context.ACTIVITY_SERVICE) as ActivityManager

    // Fetch exit reason history
    val exitReasons = am.getHistoricalProcessExitReasons(context.packageName, 0, 5)

    for (reason in exitReasons) {
        if (reason.reason == ApplicationExitInfo.REASON_CRASH_NATIVE) {
            // Read OS-generated protobuf tombstone trace
            reason.traceInputStream?.use { inputStream ->
                val traceText = inputStream.bufferedReader().readText()
                if (traceText.contains("SEGV_MTESERR") || traceText.contains("[MTE]")) {
                    throw AssertionError("MTE Violation detected in prior test run:\n$traceText")
                }
            }
        }
    }
}
Best Practices for MTE CI/CD Pipelines
-
Retain Unstripped Symbols: Ensure your
ndk-stackstep references the unstripped binaries located inbuild/intermediates/cxx/Debug/.../obj/arm64-v8a. Do not pointndk-stackat stripped APK binaries, or symbol names will be missing. -
Enforce
syncMode in CI: Always run tests insyncmode during CI builds. Async mode (async) batches hardware tag checks, causing the faulting address and stack trace to be imprecise in tombstone outputs. -
Fail Hard: Configure your script to exit with code
1ifSEGV_MTESERRis found, even if the Java test runner reported a pass (which can happen if a native thread crashed asynchronously outside the main test runner thread).
Comments
Post a Comment
Do not insert clickable links or your comment will be deleted. Checkbox Send me notifications to be notified of new comments via email.