We're bringing you a compilation of 42 features or tricks for Windows 11 , with which we hope you'll have the tools to fully master the operating system. With these, you'll learn to master new and old Windows features, as well as how to use other, more hidden or lesser-known features.
Put the start menu on the left
The main feature of Windows 11 is the change to its Start menu. Not only because it's getting rid of the tile system we saw in Windows 8 and Windows 10, but also because it now resides in the center of the screen. But if this latest change bothers you, you can move the Start menu back to the left of the taskbar to where it always has been.
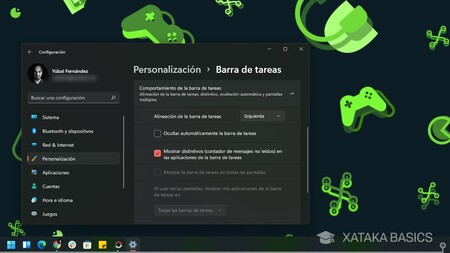
- To move the start menu to the left , go to Windows settings.
- Inside, tap on Personalization .
- Within the customization options, click on Taskbar .
- Here, click on the Taskbar Behavior section.
- Click on Taskbar Alignment , and change Center to choose the Left option .
Configure the start menu by pinning apps
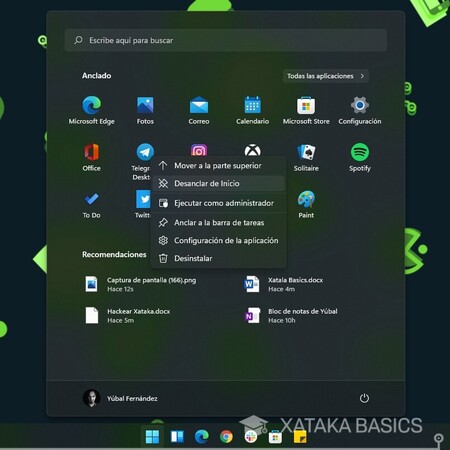
Now that there are no tiles in the Start menu, you can pin and unpin apps to decide which ones appear when you open the Start menu. To unpin apps, simply right-click on them and choose the Unpin option.
To pin apps, tap the Start menu and select All Apps in the top right corner. This will take you to the list of apps, and right-click on the one you want to select Pin to Start . If you prefer, open the Start menu and open the app you want, then right-click on it.
Use the hidden index of your all apps list
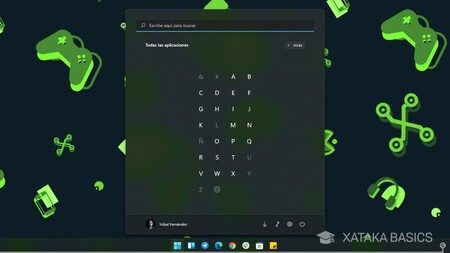
If you have a lot of apps installed, searching for a specific one if you can't remember its name can be a hassle. But there's a little trick. There's a header with each app's starting letter, and if you tap on this header, you'll access an index , where you can select the letter you want to see only apps that begin with that letter.
Start menu folder list
In the Start menu, at the bottom right, you have the button to shut down or restart your computer. You can also add folder shortcuts to this location, giving you quick access to your downloads, music, or other folders.
- Open Windows Settings, and click on the Personalization section .
- Once inside, click on the Home section .
- Inside, click on the Folders section .
- Here, you can activate the folders you want to appear.
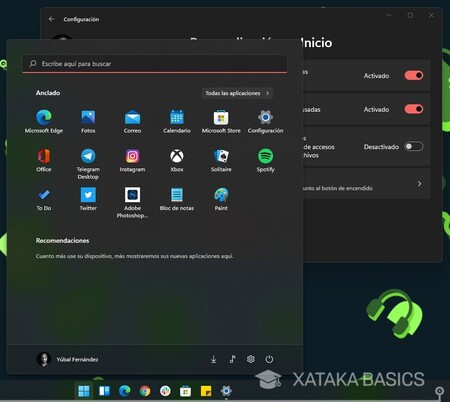
Turn off Start Menu Suggestions
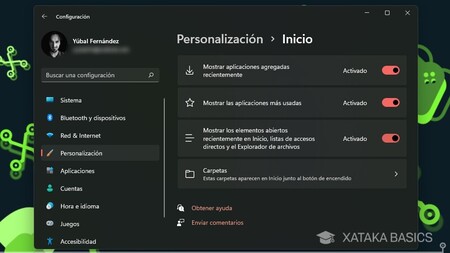
Within the Startup section of the Personalization section of Windows settings, you can also disable Start menu recommendations . This way, you can prevent shortcuts to your most frequently used applications or your most recently used or used documents and files from appearing.
Put Windows 11 in dark mode
There are two types of users in the world of operating systems: those who prefer light themes and those who prefer dark themes . Microsoft not only allows you to use either of the two, with or without transparency, but also has light and dark mode versions of its official wallpapers. So, you can activate dark mode knowing it'll be well-adapted.
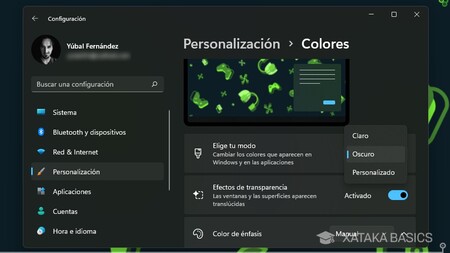
- Go to Windows Settings.
- Inside, go to Personalization .
- Within the customization options, click on Colors .
- Click the Choose your mode button , and select light or dark.
- You can also customize it to choose light and dark elements.
- You can turn transparency on or off in the tabs.
- You can also choose the accent color, which affects, for example, the app indicator you're using in the bottom bar.
Personalize Windows with its theme system

And if you want to customize Windows beyond its dark or light mode, in Personalization you'll find a small repertoire of themes, which are designs to configure Windows, with backgrounds, sounds, colors, and even different mouse pointers. Several come pre-installed so you can play around with them.
And if that's not enough, you have a Themes section where you can customize your own themes and then save them as your own. You even have an Explore Themes button , which opens the Microsoft Store themes section so you can download themes created by different users, which can be free or paid.
Use its split-screen modes
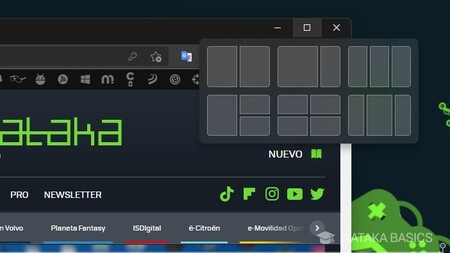
One of the big new features in Windows 11 is its split-screen system , which offers different configurations for organizing your open apps. You can create the typical split-screen display, but you also have other options to organize two, three, or four apps.
All you have to do is hover your mouse pointer over the full-screen button that appears in the upper-right corner of a Windows window. A window will appear with the different options available, and you just have to click on the side where you want to place the current application within the layout you choose.
Use the dictation function
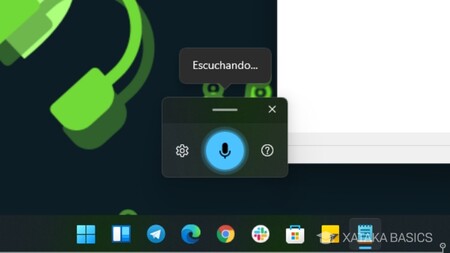
There's a little-known feature that can be useful when you want to write but don't feel like typing. It's the dictation function. Press the Windows + H keys on your keyboard at the same time , and the dictation function will appear. Now, just press the microphone icon and speak so Windows can understand and type what you say.
Additionally, if you go into this feature's settings, you can activate automatic punctuation . With this, Windows will listen for your pauses while you speak and interpret them to add commas and periods to the text it writes for you.
Shake an app window to minimize other apps
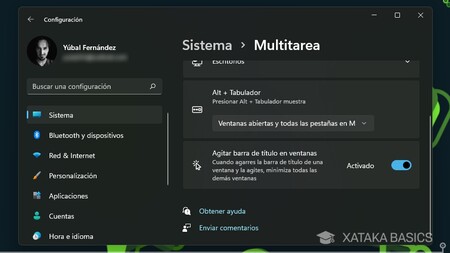
This is a very interesting feature. You can activate an option so that when you "grab" an application's title bar with the mouse and shake it , the rest of your open windows will minimize without you having to do anything else. This can be handy when you have a lot of windows open and want to shake all but one.
- To activate this option, go to Windows settings.
- Inside, go to System .
- Now, go into Multitasking .
- Scroll down to the Shake title bar in windows option and turn it on.
Comments
Post a Comment
Do not insert clickable links or your comment will be deleted. Checkbox Send me notifications to be notified of new comments via email.