
Tips Every Windows 7 User Needs to Know.

Keyboard Shortcuts for Committed Mouse Abolitionists.

Let’s kick off this power-user party with keyboard shortcuts—tricks every enthusiast should memorize when mastering a new OS. We’re confident the following time-saving keystrokes will save you precious neural processing cycles, and make your mouse jealous with neglect.

Alt + P

In Windows Explorer, this shortcut activates a preview pane of your selected file, be it an image, sound, or video document. This panel is great for previewing images in your photos directory, obviating the need for fancier third-party software.

Windows + Up and Windows

+ Down

If a window isn’t maximized, pressing the Windows + Up arrow key willmake it fill your entire screen. Windows + Down arrow will minimize that active window.Windows + Shift + Up

and Windows + Shift + Down

Hitting these three keys will vertically stretch an active window tothe maximum desktop height (the width of the window, however, will staythe same). Pressing Windows + Shift+ Down will restore the window to its previous dimensions.Windows + + and Windows

+ -


Pressing the Windows button with either the plus or minus key activates the Magnifier, letting you zoom in on the entire desktop or open a rectangular magnifying lens to zoom in on (and out of) parts of your screen. You can also customize the Magnifier to follow your mouse pointer or keyboard cursor.

Windows + Left and Windows

+ Right

These two shortcuts will make your active window fill up exactly onehalf of your screen—depending on which arrow key you use. And once awindow is fixed to one side of the screen, you can repeat the shortcutwith the same arrow key to flip it to the other side.Windows + HomeThis shortcut minimizes every open window on your desktop except the

active window. Pressing this shortcut again restores all the minimized windows.

Windows + T

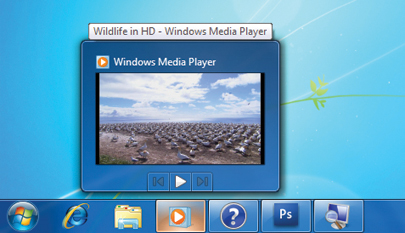
Like Alt + Tab (still our all-time-favorite Windows shortcut), Windows + T cycles through thumbnails of your open programs via the Taskbar’s peek menu.

Windows + E

Automatically opens up a new Explorer window to show your Libraries
folder.

Windows + P

Manage your multiple-monitor setup more efficiently with this handy shortcut. Windows + P opens a small overlay that lets you configure a second display or projector. You can switch from a single monitor to dual-display in either mirror or extend-desktop mode.

Windows + Shift + Left

and Windows + Shift + Right

If you’re using two or more displays—and you are, aren’tyou?—memorize this shortcut to easily move a window from one screen tothe other. The window retains its size and relative position on the newscreen, which is useful when working with multiple documents.Windows + [Number]

Programs (and new instances) pinned to your Taskbar can be launched by hitting Windows and the appropriate number key. Windows + 1, for example, launches the first application in the taskbar, while Windows + 4 will launch the fourth.

Windows + Space

This combo performs the same function as moving your mouse to the bottom right of the Taskbar: It makes every active window transparent (save faint outlines) so you can view the desktop underneath.

Track Your Actions with Problem Step Recorder.


To aid their development of Windows 7 beta versions, the Microsoftengineers built in a diagnostic tool called Problem Steps Recorder thatcombines screen captures with mouse tracking to record your actions. Youcan launch this program from the Start Menu by typing psr.exe in thesearch field. Hit the Record button and the applet tracks your mouse andkeyboard input while taking screenshots that correspond with each newaction. When you stop recording, your session is saved to an HTML slideshow recreating your steps, to which you can add comments and

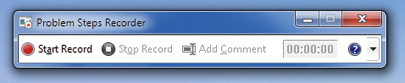
annotations. This tool is insanely useful if you need to create a tutorial for a computer-illiterate relative. Hi Mom, hi Dad!

Master Your New Font Manager.


Font management is much improved in Windows 7. The Add Fonts dialogis history, and in its place is new functionality within the Fontsfolder itself. First, the folder now shows font previews via each fontfile’s icon (visible with Large or Extra Large icon views). Second,fonts from a single set will no longer show up as different fonts;they’re now combined as a single family, which can be expanded bydouble-clicking the icon. Third, you can now toggle fonts on and off byright-clicking a font icon and selecting the Hide option.

This preventsapplications from loading the font (thus saving memory), but still keeps the file retained in the Font folder. Finally, Windows 7 includes a newfancy, free-flowing font called Gabriola that shows off the advanced antialiasing, text rendering, and “stylistic alternate” font flourishesafforded by DirectWrite (Microsoft’s API for 2D text rendering) andOpenType.

If you liked this article, subscribe to the feed by clicking the image below to keep informed about new contents of the blog:

windows_xp

Comments

Popular posts from this blog

How to change the size of the touch and on-screen keyboard in Windows 10

Windows 10 PCs come with two keyboard apps, one is the OnScreen Keyboard , and the other is the Touch Keyboard . Basically, you don't need a touch screen to use the on-screen keyboard. It displays a virtual keyboard on the screen and you can use the mouse to select and press the keys. Although the on-screen keyboard app is very useful when we don't have a physical keyboard, its size is always a problem for users. You can move or enlarge the virtual keyboard from the icons in the upper right corner. If you want, you can also easily resize it. Changing the size of the on-screen keyboard is very easy. Type On-Screen Keyboard in your Windows search and run the desktop app, or you can also go via Settings > Ease of Access > Keyboard> Turn on the On-screen keyboard.   To change the size of the on-screen keyboard, move the cursor to the corner and drag it to the desired size. Resizing the touch keyboard is as simple as doing it! Just drag it and resize it us...

Windows Media Player 12 Themes for Windows 7

Bored of your default Windows Media Player Skins?. Grab some fresh and new Windows Media Player 12 themes for Windows 7 ! Windows Media Player 12 Codecs Windows Media Player 12 comes with support for DivX and MP4, but it still lacks supports for many other video formats. (amr | mpc | ofr | divx | mka | ape | flac | evo | flv | m4b | mkv | ogg | ogv | ogm | rmvb | xvid)ù A popular codec pack can be downloaded here and here . Windows Media Player 12 Skins The following skin packages includes some really awesome themes for your Windows Media Player: Alienware Theme Batman Theme Catwoman Theme Darkstar Theme Half-Life Theme Halo 2 Theme The Last Samurai Theme Stalker Theme XBOX Theme XSN Sports Them Download Windows Media Player Themes Pack 1 (70 Skins) Download Windows Media Player Themes Pack 2 (12 Skins) New Year Theme 2010 for Windows 7 This theme can be downloaded for free from uploaded.to Custom Search If you liked this article, subscribe t...

Windows 10 compatibility reaches most of the hardware currently in use.

Windows 10 will be compatible with most existing PC hardware; most devices running Windows 7, Windows 8, or Windows 8.1 will meet the requirements for Windows 10. For full system requirements, see Windows 10 specifications. Some driver updates may be required for Windows 10. Existing desktop (Win32) application compatibility is also expected to be strong, with most existing applications working without any changes. Some applications that interface with Windows at a low level, those that use undocumented APIs, or those that do not follow recommended coding practices could experience issues. Windows 10 compatibility reaches most of the hardware currently in use. - The World of Windows. Contents: [ hide ] Windows 10 compatibility reaches most of the hardware currently in use. Existing Windows Store (WinRT) apps created for Windows 8 and Windows 8.1 should also continue to work, because compatibility can be validated against all the apps that have been submitted to the Windows ...